The Lost Cowboy
Call Me a Cab
- Messages
- 2,620
- Location
- Southeast Asia
Thank you for the info and advice. Very helpful!
I've also reached out to the Hattery and asked about the options/difficulty in replacing the ribbon, and they warned me about this in their reply:
"you don’t want to replace with a narrower ribbon either as holes in the felt may be noticeable."
Have you experienced this? That's what I'm afraid of, because I would most likely replace it with something narrower for the more casual look.
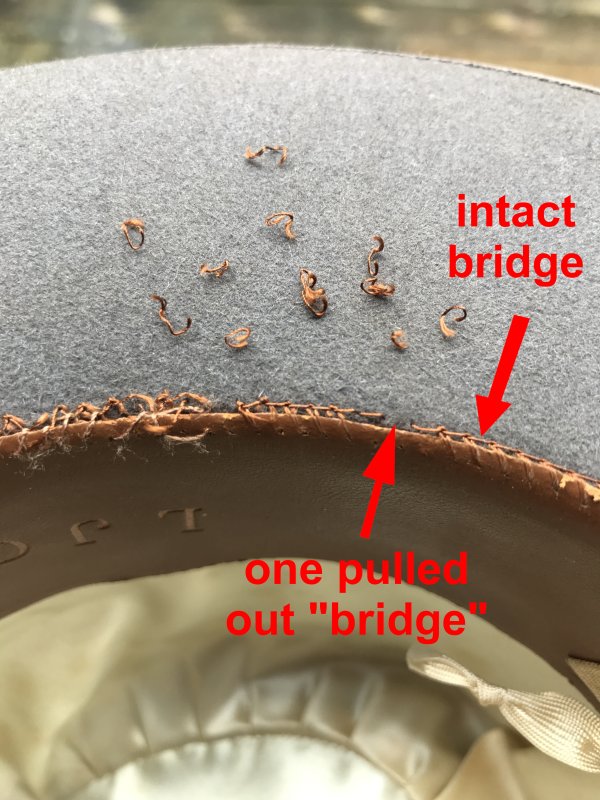
I hate to disagree with the ladies at the Hattery (it’s not the first time, either - but they are awesome anyway!) but in my experience Akubra stitching is the same as most other hats with visible stitching - it is at the bottom of the crown right above the brim break and even a thin ribbon would cover it. I don’t know of any other holes or other visible blemishes in a FED IV to be concerned about, and I have taken one completely apart before.
I believe @RickP has been doing a lot of hat remodeling lately and might be able to speak to that question more adequately than I can but definitely the FED IV I have with me here in Asia has stitching that would be completely covered even by a thin ribbon.
Good to hear you reached out to them and I hope you’ll keep us updated on your decision!