Want to buy or sell something? Check the classifieds
  • The Fedora Lounge is supported in part by commission earning affiliate links sitewide. Please support us by using them. You may learn more here.

The Lost Cowboy

One Too Many
Messages
1,699
Location
Southeast Asia
Thank you for the info and advice. Very helpful!

I've also reached out to the Hattery and asked about the options/difficulty in replacing the ribbon, and they warned me about this in their reply:

"you don’t want to replace with a narrower ribbon either as holes in the felt may be noticeable."

Have you experienced this? That's what I'm afraid of, because I would most likely replace it with something narrower for the more casual look.

I hate to disagree with the ladies at the Hattery (it’s not the first time, either - but they are awesome anyway!) but in my experience Akubra stitching is the same as most other hats with visible stitching - it is at the bottom of the crown right above the brim break and even a thin ribbon would cover it. I don’t know of any other holes or other visible blemishes in a FED IV to be concerned about, and I have taken one completely apart before.

I believe @RickP has been doing a lot of hat remodeling lately and might be able to speak to that question more adequately than I can but definitely the FED IV I have with me here in Asia has stitching that would be completely covered even by a thin ribbon.

Good to hear you reached out to them and I hope you’ll keep us updated on your decision!

 
Messages
10,862
Location
vancouver, canada
I hate to disagree with the ladies at the Hattery (it’s not the first time, either - but they are awesome anyway!) but in my experience Akubra stitching is the same as most other hats with visible stitching - it is at the bottom of the crown right above the brim break and even a thin ribbon would cover it. I don’t know of any other holes or other visible blemishes in a FED IV to be concerned about, and I have taken one completely apart before.

I believe @RickP has been doing a lot of hat remodeling lately and might be able to speak to that question more adequately than I can but definitely the FED IV I have with me here in Asia has stitching that would be completely covered even by a thin ribbon.

Good to hear you reached out to them and I hope you’ll keep us updated on your decision!
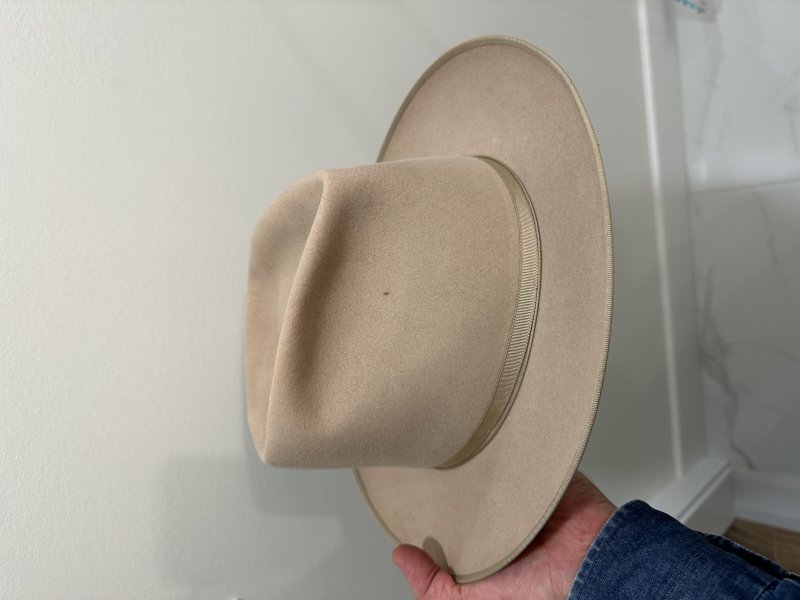
I do a fair bit of hat restoration work. Unless Akubra has screwed up and misplaced the stitching even a narrow 3/8" ribbon would cover the sweat band stitching. It is as the Lost Cowboy states, it sits just above the brim break.
 

Woodtroll

One Too Many
Messages
1,264
Location
Mtns. of SW Virginia
Does Akubra tack the corners of their wide bows and ribbons with small stitches? Even if they did, I can't imagine that any high holes from tacking could not be massaged out of the felt, especially if it were new. I replaced the ribbon and bow on my Adventurer some years ago, but I don't remember if it was tacked on the top corners or not.
 
Messages
10,862
Location
vancouver, canada
Does Akubra tack the corners of their wide bows and ribbons with small stitches? Even if they did, I can't imagine that any high holes from tacking could not be massaged out of the felt, especially if it were new. I replaced the ribbon and bow on my Adventurer some years ago, but I don't remember if it was tacked on the top corners or not.
Even if the stitch holes show....(which is not likely).....a wee bit of steam will close the hole.
 

BdSal

New in Town
Messages
4
Does Akubra tack the corners of their wide bows and ribbons with small stitches? Even if they did, I can't imagine that any high holes from tacking could not be massaged out of the felt, especially if it were new. I replaced the ribbon and bow on my Adventurer some years ago, but I don't remember if it was tacked on the top corners or not.
Got confirmation from The Hattery folks that the bow has stitches up higher on the Fed IV securing it.
But I trust that, like some of you have mentioned, it might be a non-issue.

In the meantime, does anyone have any pics of their Fed IV with a bow-less, thinner, more casual-looking band? I'm looking for ideas, in case I go that route.
 

Jimmy__patt

New in Town
Messages
26
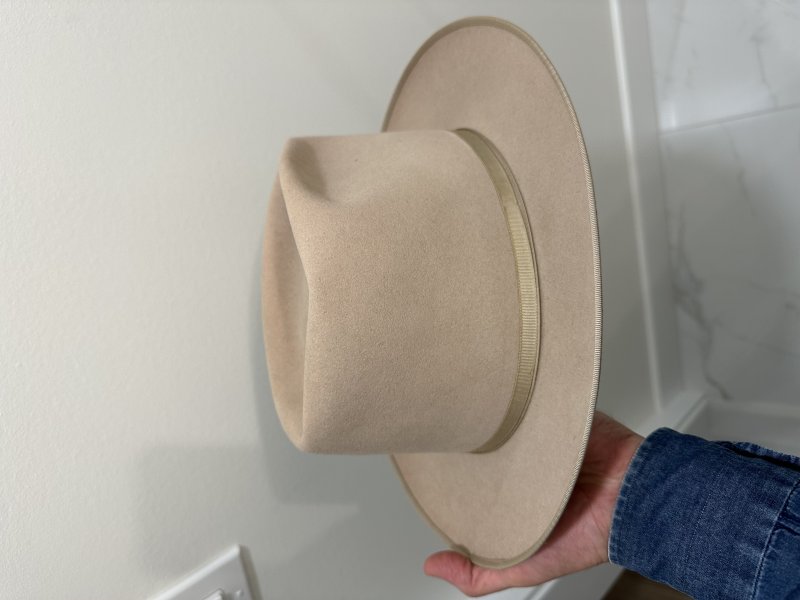
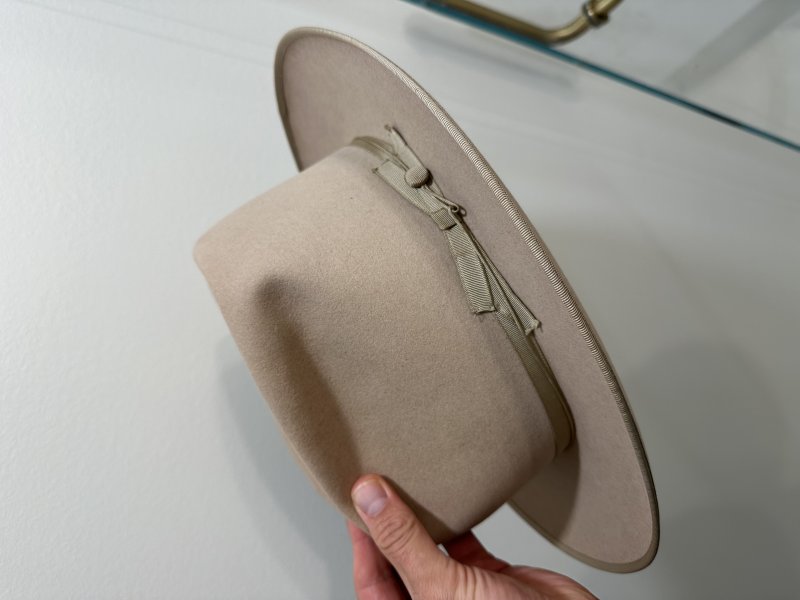
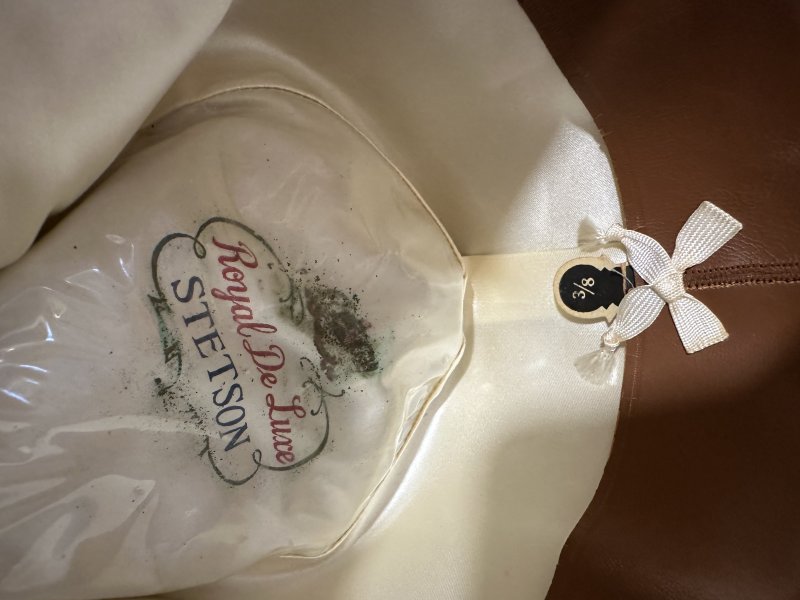
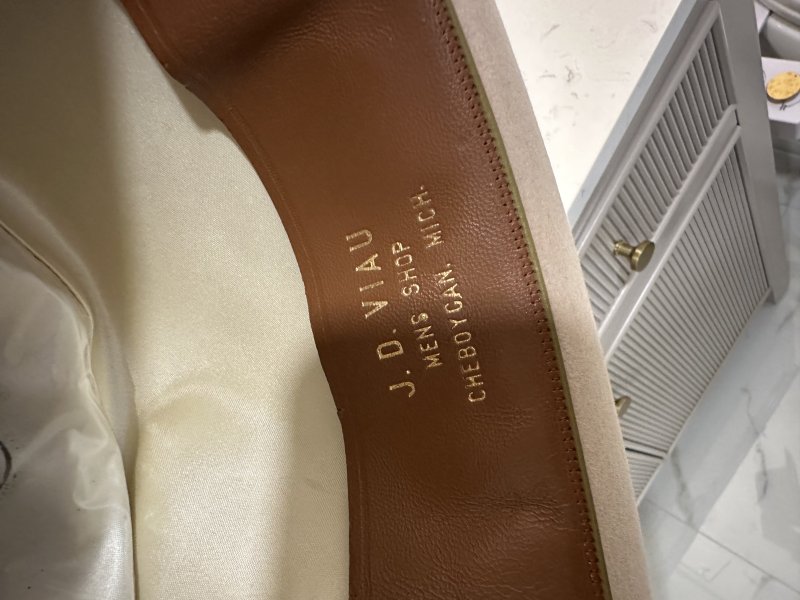
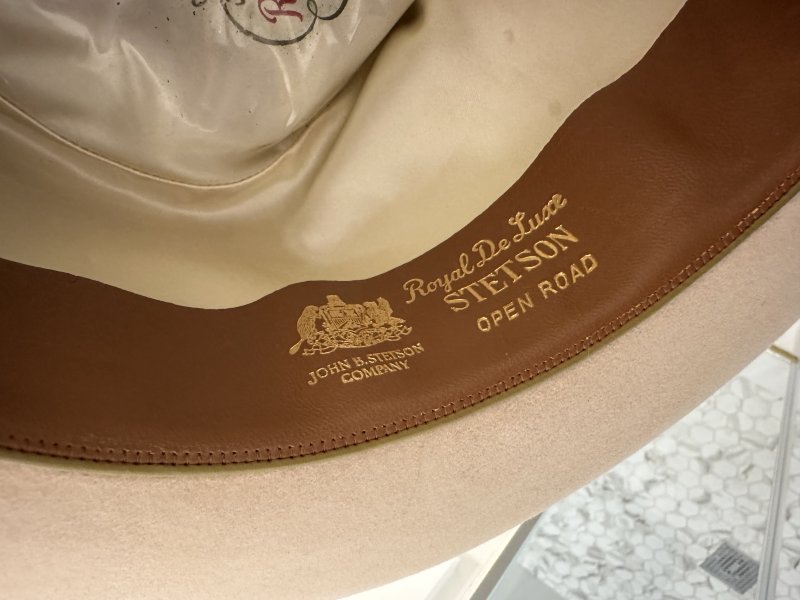
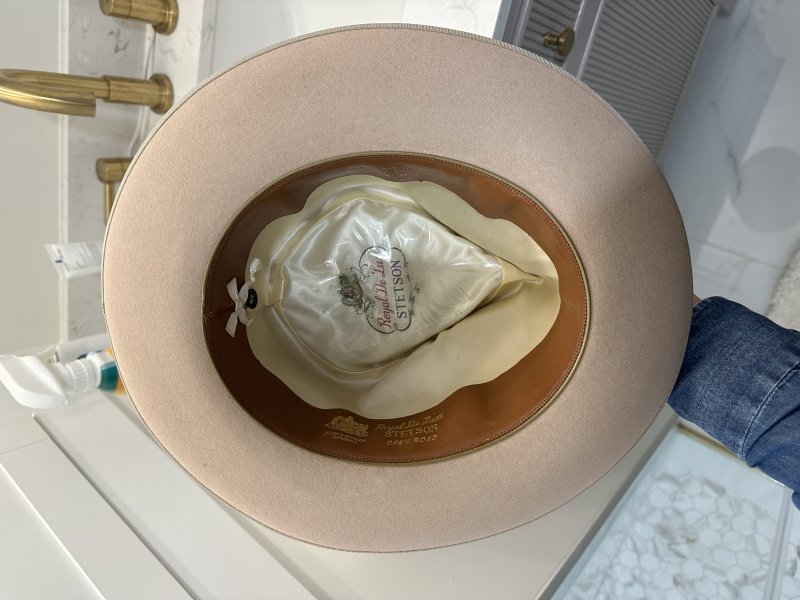
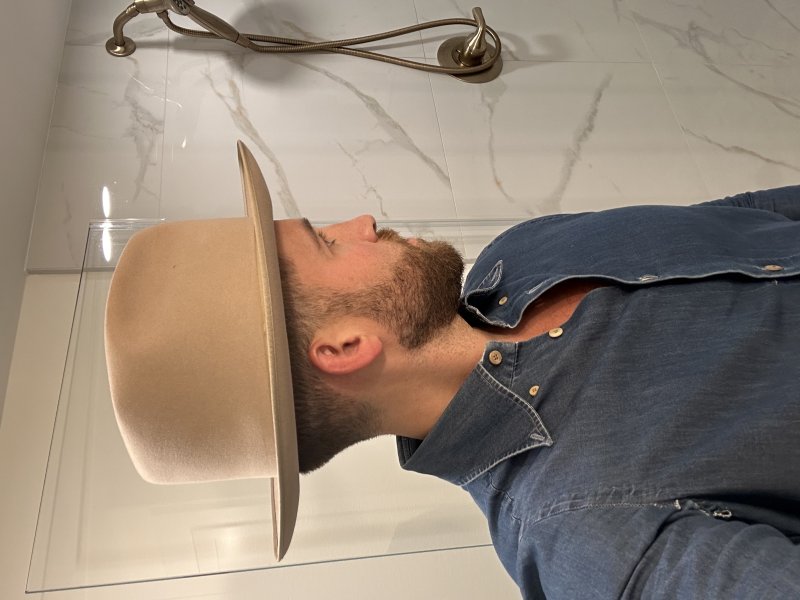
I acquired a new hat off poshmark for a great price and in amazing condition. It actually might be the best hat I own in terms of fit. It certainly feels the most comfortable on my head, more than my others. I'm really happy with it and I believe it's from the 1950's era.
 

Attachments

  • IMG_4673.jpeg
    IMG_4673.jpeg
    1.7 MB · Views: 67
  • IMG_4682.jpeg
    IMG_4682.jpeg
    2.4 MB · Views: 49
  • IMG_4681.jpeg
    IMG_4681.jpeg
    2.4 MB · Views: 51
  • IMG_4680.jpeg
    IMG_4680.jpeg
    2 MB · Views: 56
  • IMG_4679.jpeg
    IMG_4679.jpeg
    1.6 MB · Views: 53
  • IMG_4678.jpeg
    IMG_4678.jpeg
    1.9 MB · Views: 53
  • IMG_4677.jpeg
    IMG_4677.jpeg
    1.6 MB · Views: 53
  • IMG_4676.jpeg
    IMG_4676.jpeg
    2.8 MB · Views: 51
  • IMG_4675.jpeg
    IMG_4675.jpeg
    1.7 MB · Views: 59
  • IMG_4674.jpeg
    IMG_4674.jpeg
    1.7 MB · Views: 53

SnowyViking

New in Town
Messages
37
Hi. I'm trying to attach that "bow tie?" on the side of the hat band and I'm not sure how to attach it either with glue or sewing.So I'm wonder what to do.I'm not sure if it's called a bow tie or not either.
20241008_181554.jpg
 
Messages
10,862
Location
vancouver, canada
Hi. I'm trying to attach that "bow tie?" on the side of the hat band and I'm not sure how to attach it either with glue or sewing.So I'm wonder what to do.I'm not sure if it's called a bow tie or not either.
View attachment 645383
It is called just 'the bow', the piece of ribbon that wraps the bow horizontally is called 'the keeper'. If you glue it on, the ghost of hat makers passed will come to your house and haunt you......forever!

5 stitches and it is done. You have a choice to do invisible stitches or if not fussy just do a visible tack stitch. Visible: One stitch in the top and bottom corners of each bow loop end. One tack stitch underneath the bow keeper. I write a column for HaTalk eMagazine that covers an aspect of hat making each issue. I think there is a 30 day free trial and all back issues are archived. I wrote an article specifically on sewing ribbons/bows with pictures.
 
Messages
10,862
Location
vancouver, canada
Look inside of another hat and you'll see how the ribbon is stitched. Don't glue it unless you want to build a reputation for cheaply made hats. Taking a hat apart is really instructive to building a hat.
Sometimes that is risky. I have deconstructed felt hats with ribbons/bows done with staples, glues, and double sided tape.
 

MikeP

New in Town
Messages
27
Location
Colorado
Does anyone know when PMM WESTERN WEAR in Denver closed? It was a well known western store on east Colfax ave. for years.
 

AHP91

One Too Many
Messages
1,070
Hello,

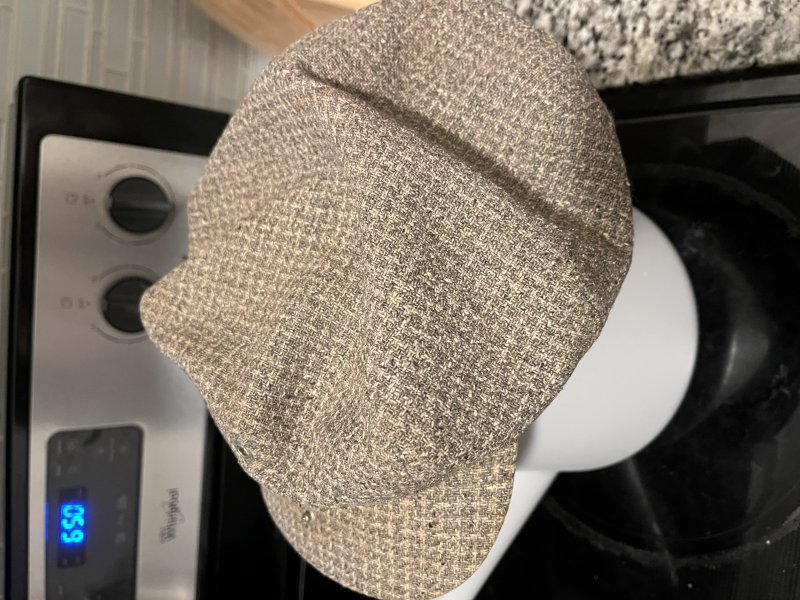
I have this old adjustable newsboy cap. It appears the inner leather strap and hook is still all intact. I’m trying to make this cap bigger. Unfortunately i can’t seem to create more slack. Do I have to basically carefully feed more strap into the opening in the fabric opening to try and increase the circumference? Sorry if this explained poorly
IMG_0283.jpeg
IMG_0281.jpeg
IMG_0281.jpeg
 

Attachments

  • IMG_0282.jpeg
    IMG_0282.jpeg
    3.7 MB · Views: 46

Wangenheim

Familiar Face
Messages
95
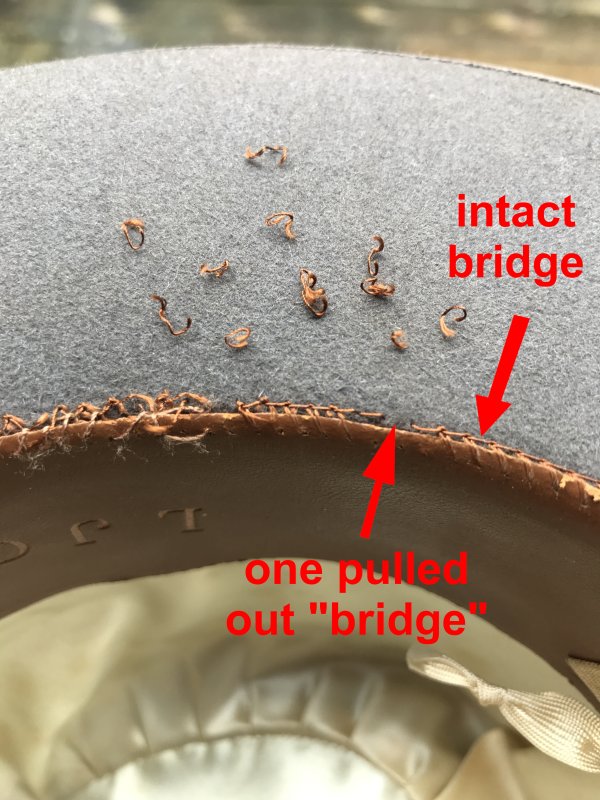
As I try to resew an unreeded sweatband and searched for instructions, nobody seemed to adress, that there are two seams. There is one seam going around the underside of the brim (which mysteriously dips inside the felt), and a second one which connects the sweatband to the first seam. The second one is easy to make: Go through the holes of the sweatband and through the first seam. Sometimes that's enough, because the first seam is still fine. But what if the first one falls apart?

The magic lies in this first seam: The thread is visible a couple of mm and then dives down into the felt. There it's anchored somehow, then it comes out again and leaves to the next anchor point.

What really strikes me is the following: When the seam goes apart (as with one of my Emersons), it is not because the thread cuts through the felt. No, you can pull out every single part of the thread and get 1/2 inch long twisted threads. You pull them out as if someone cut the thread inside the felt! How the hell did this happen? It's an absolute mystery to me. But I can't replicate this seam, if I don't understand how it works and so how it was done.

Does anyone understand how they did it? Because if a machine can do it, you certainly could do it by hand.
 

Attachments

  • Emerson sweatband seam falling apart.jpg
    Emerson sweatband seam falling apart.jpg
    5.1 MB · Views: 41

RickP

Practically Family
Messages
936
As I try to resew an unreeded sweatband and searched for instructions, nobody seemed to adress, that there are two seams. There is one seam going around the underside of the brim (which mysteriously dips inside the felt), and a second one which connects the sweatband to the first seam. The second one is easy to make: Go through the holes of the sweatband and through the first seam. Sometimes that's enough, because the first seam is still fine. But what if the first one falls apart?

The magic lies in this first seam: The thread is visible a couple of mm and then dives down into the felt. There it's anchored somehow, then it comes out again and leaves to the next anchor point.

What really strikes me is the following: When the seam goes apart (as with one of my Emersons), it is not because the thread cuts through the felt. No, you can pull out every single part of the thread and get 1/2 inch long twisted threads. You pull them out as if someone cut the thread inside the felt! How the hell did this happen? It's an absolute mystery to me. But I can't replicate this seam, if I don't understand how it works and so how it was done.

Does anyone understand how they did it? Because if a machine can do it, you certainly could do it by hand.
The leather looks to be ok so it sounds like dry rotted cotton thread to me. When I replace a sweatband I sew the sweat in with a basting stitch with a white thread ( so I can see to remove it later. ) Once the basting stitch has things positioned correctly, I turn the sweatband inside out and sew the little 1/2" flange on the back of the sweat to the felt from the inside (poke the needle through the flange and crown felt making sure I stay an 1/8" or so above the crown flange at the brim. Once done I remove the contrasting basting stitch. A bit more work, but theres no chance of funky looking stitching around the sweat edge. If your sweatband dosent have a flange on the back you may have to carefully stitch through the old holes. Either way Id say you prob need to totally remove the sweat and make sure you have all the thread strands removed before things go back together. Good luck!
 

Wangenheim

Familiar Face
Messages
95
That would be a nice option to sew it "behind" the hat band so to speak. But as the sweatband is unreaded, there is no such flange attached. They did it somehow different.

I even considered, that they stitched through to the top of the brim (where some kind of line is just visible) and then did an additional felting of the felt to cover it : /
 

RickP

Practically Family
Messages
936
That would be a nice option to sew it "behind" the hat band so to speak. But as the sweatband is unreaded, there is no such flange attached. They did it somehow different.

I even considered, that they stitched through to the top of the brim (where some kind of line is just visible) and then did an additional felting of the felt to cover it : /
Many hat companies used a special cylinder arm stitching machine that had the needle carriage at about a 30 degree angle to the base. The crown of the hat was slipped over the arm so the brim was vertical. Attachments held the hat at the perfect angle and then the stitching was done from the inside out. ( that was so the visible stitches on the sweat would be neat. ) There have been several times Ive been tempted to figure out how to build a jig for my Cobra class 4 machine... Sewing in a reeded band would be simple... fold it out and sew straight through the crown and flange as close to the edge as needed. it sure would speed things up and result is a lot fewer bleeding, pricked fingers lol

For a non reeded band without a backside flange, I say consider doing a saddle stitch with a needle on both ends of the thread right where the old holes are. Just follow the existiing holes. Gives a nice neat stitch, and it allows for one needle halfway through to tell you the angle and location for where the other needle needs to go through. Since youre not worried about turning the sweatband inside out to sew, you might be able to position things using 3m double sided tape to hold in place. Just make sure its far enough away from where the needle goes... I found out the hard way from leather projects, that it will gum up a clean sharp needle beyond use quickly. And then of course remove the positioning tape after things are sewn in

Then theres always the option of replacing the sweat with a newly made, nice custom fit reeded sweatband
 

CRH

Call Me a Cab
Messages
2,272
Location
West Branch, IA
As I ttryto resew an unreeded sweatband and searched for instructions, nobody seemed to adress, that there are two seams. There is one seam going around the underside of the brim (which mysteriously dips inside the felt), and a second one which connects the sweatband to the first seam. The second one is easy to make: Go through the holes of the sweatband and through the first seam. Sometimes that's enough, because the first seam is still fine. But what if the first one falls apart?

The magic lies in this first seam: The thread is visible a couple of mm and then dives down into the felt. There it's anchored somehow, then it comes out again and leaves to the next anchor point.

What really strikes me is the following: When the seam goes apart (as with one of my Emersons), it is not because the thread cuts through the felt. No, you can pull out every single part of the thread and get 1/2 inch long twisted threads. You pull them out as if someone cut the thread inside the felt! How the hell did this happen? It's an absolute mystery to me. But I can't replicate this seam, if I don't understand how it works and so how it was done.

Does anyone understand how they did it? Because if a machine can do it, you certainly could do it by hand.
I see a whip stitch and a ladder stitch. There are variations of these. Nice photos. Thanks
 

Wangenheim

Familiar Face
Messages
95
It only seems to be a ladder stitch from this side. But the thread doesn't come out on the other side of the brim (as with any hat). That's the thing (unless as I said they covered the seam by refelting).
 

Forum statistics

Threads
109,325
Messages
3,078,932
Members
54,243
Latest member
seeldoger47
Top