- Messages
- 11,324
- Location
- vancouver, canada
Yes, thanks. I shall try that next time.Not sure what you mean by tab. I try to run the pins and my stitching just above the reed, using the reed stitching to hide the sweat stitches.
Does that make sense?
Yes, thanks. I shall try that next time.Not sure what you mean by tab. I try to run the pins and my stitching just above the reed, using the reed stitching to hide the sweat stitches.
Does that make sense?
I have been using both the Sullivan sweats and Tim's. I prefer Tim's as they seem to me to be a bit thicker and more supple and worth the extra few dollars.Yep, I use about the same spacing when hand sewing. I recently purchased sweatbands that are twice as thick as what I normally use and the machine, as set up, will not sew them properly so I've been forced to hand sew them. I've definitely been spoiled.
The new, thicker sweats I purchased came from Sullivan. I like his sweats but my 1107 just won't sew them properly. I suppose I could spend a few hours re-adjusting the machine, but I think it'll be easier just to source thinner sweats.I have been using both the Sullivan sweats and Tim's. I prefer Tim's as they seem to me to be a bit thicker and more supple and worth the extra few dollars.
Tim's seem a bit thicker but I have not put calipers to them. They do seem a bit softer and easier to hand sew than the Sullivans....but that just might be my overactive imagination.The new, thicker sweats I purchased came from Sullivan. I like his sweats but my 1107 just won't sew them properly. I suppose I could spend a few hours re-adjusting the machine, but I think it'll be easier just to source thinner sweats.
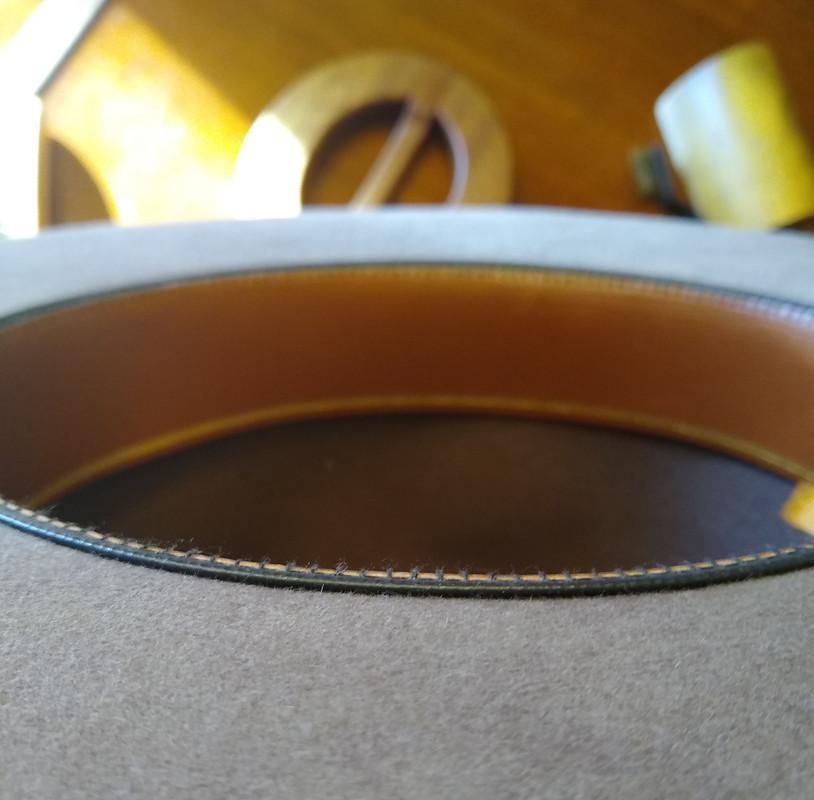
I baste stitch all around. I did the tack stitching for a while but found that the tack method didn't work as well at helping to keep the reed flush against the brim at the opening. Baste stitching all around only takes me a couple of minutes, but worth the extra effort. Everyone has their own way and baste stitching all around works best for me.I have been doing the baste stitch first but on my next one I will try just tack stitching the sweat in 3 or 4 locations to see how that works....may save me 30 minutes! Don't think I will ever get to the point of wanting to buy the machine and learn the mastery of that......hand sewing will keep me busy and out of trouble....to a degree.
My issue is exactly that....... keeping the reed flush and not allowing it to creep up proud of the brim. If I don't get it right with the baste it invariable ends up wrong and I have to begin all over again. It is somewhat of a Duh! moment but also learned that if I get the blocking right and the sweat fits in perfectly all tends to flow smoothly from that. If I don't get it right then I end up fighting the damn thing the entire way and invariably not happy with the end result.I baste stitch all around. I did the tack stitching for a while but found that the tack method didn't work as well at helping to keep the reed flush against the brim at the opening. Baste stitching all around only takes me a couple of minutes, but worth the extra effort. Everyone has their own way and baste stitching all around works best for me.
When I was doing Roofing I would lay out my roofs by chalking every line. It took me just a little while longer to lay out my roofs but I made up for that extra effort in speed and straight rows when I started nailing down my shingles.
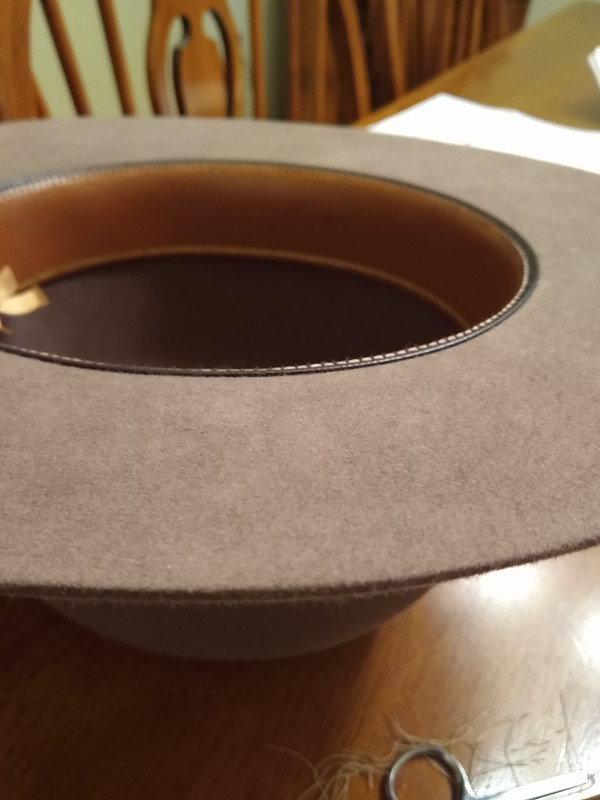
So, after I finish my baste stitching all around and sew in my permanent stitches I end up with my sweat band reeds tight and flush against the brim at the opening.
To add, when sewing in your permanent stitches, keep 'em low. That's also important in keeping your reed flush against the brim.
This is for hand stitching.
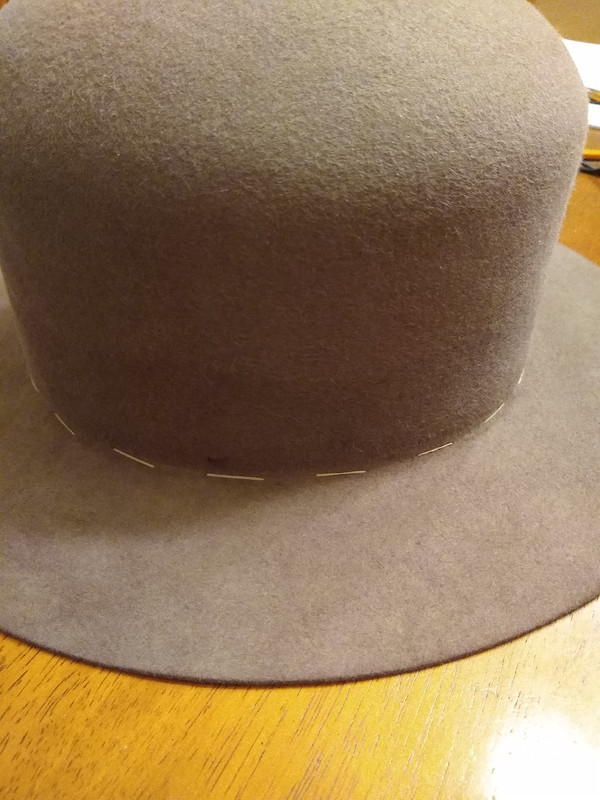
I will dig out the camera and shoot some pics tomorrowT Jones and Belfastboy, what is this reed and basting stuff y'all are talking about? Do you have some pictures you can post describing these parts and how they are supposed to look, please?
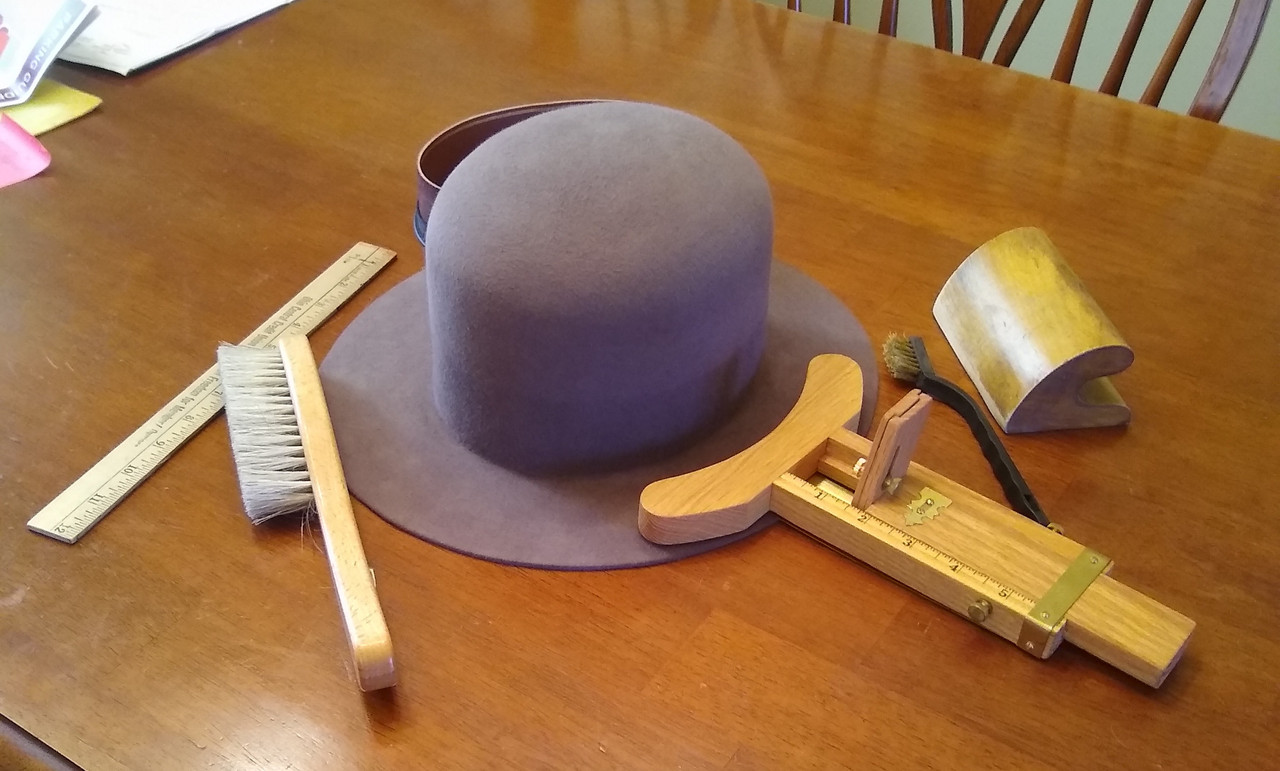
Here are pics of my first attempt at an Indiana Jones fedora. The client is picking it up on Wednesday. Tonak rabbit with Temple of Doom as the model View attachment 284739 View attachment 284740 View attachment 284741
 John Lofgren Monkey Boots Shinki Horsebuttt - $1,136 The classic monkey boot silhouette in an incredibly rich Shinki russet horse leather.
 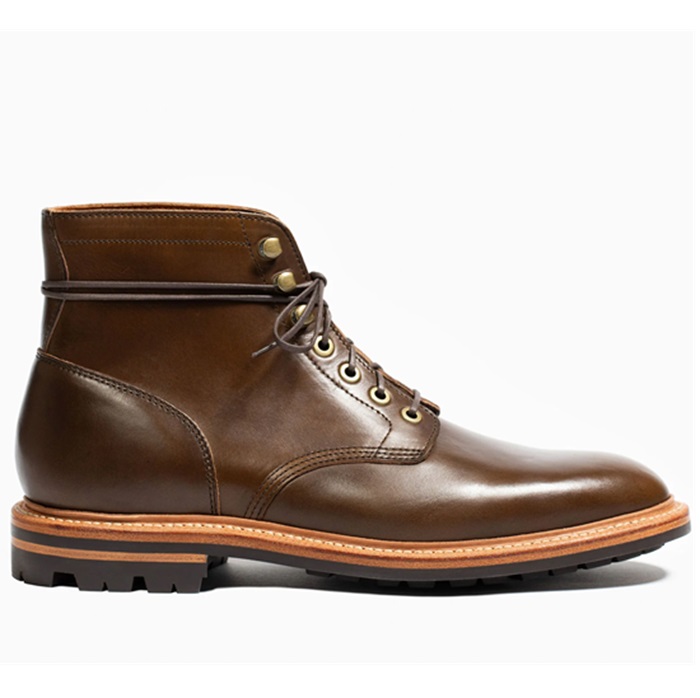 Grant Stone Diesel Boot Dark Olive Chromexcel - $395 Goodyear welted, Horween Chromexcel, classic good looks.
 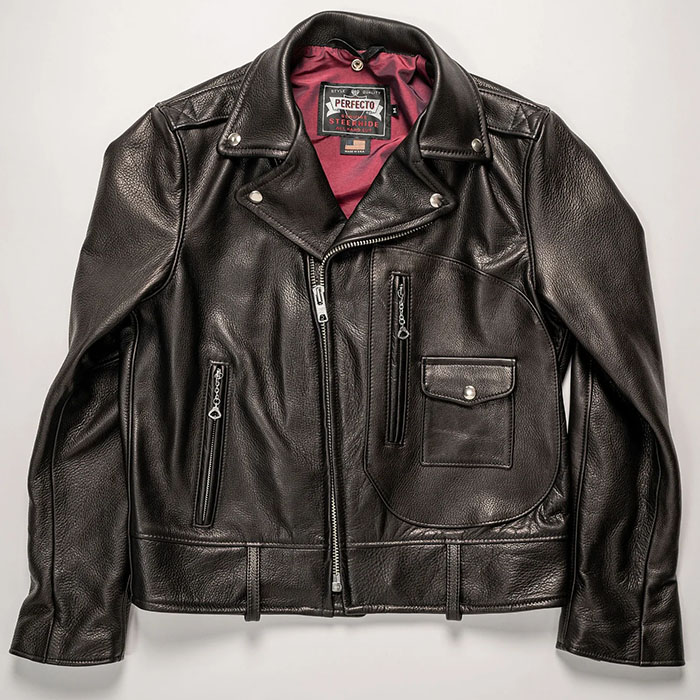 Schott 568 Vandals Jacket - $1,250 The classic Perfecto motorcycle jacket, in a very special limited-edition Schott double rider style.
 No, I chickened out on the brim. The client is not a 'true' Indy fan and was willing to forgo the exactness of the replica. I will attempt it on a cheaper felt before I risk screwing up a good one.Dimensional brim?
No, I chickened out on the brim. The client is not a 'true' Indy fan and was willing to forgo the exactness of the replica. I will attempt it on a cheaper felt before I risk screwing up a good one.
T Jones and Belfastboy, what is this reed and basting stuff y'all are talking about? Do you have some pictures you can post describing these parts and how they are supposed to look, please?
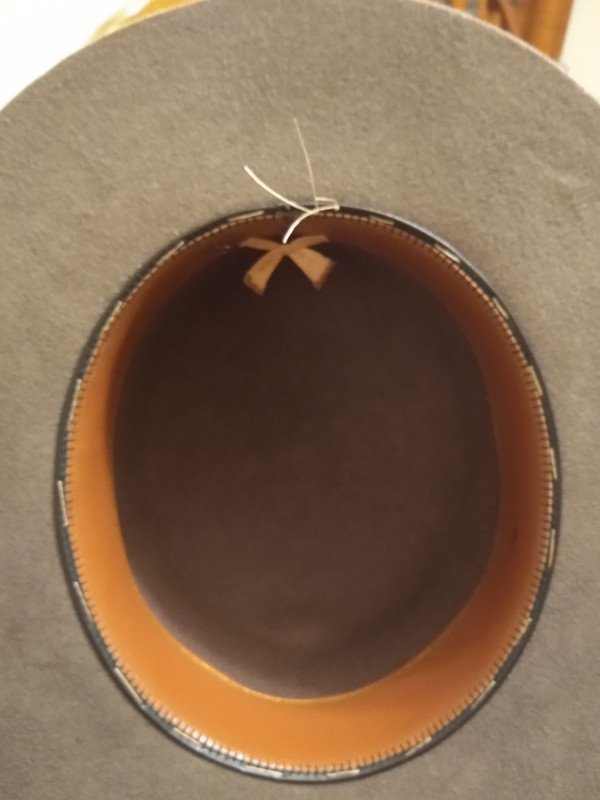
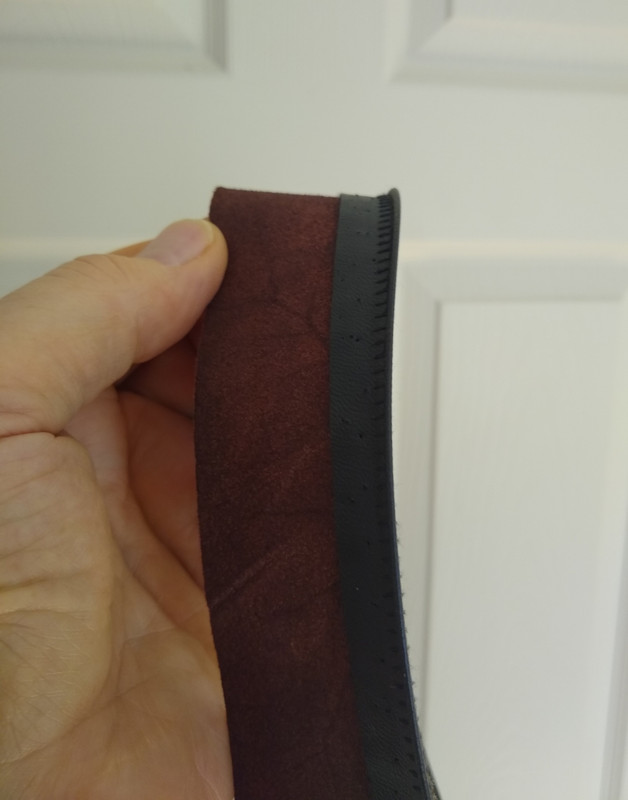
I think what you see isn't stitching. It's the edge of the sweat itself. I get my sweat bands from Sullivan Hat Company and that's just how his sweats are. Aside from that they're very nice and I have never had the first issue with them.... Plus they're soft and comfortable. So I don't sweat it, so to speak.Thanks, T Jones.
In the last picture, the white stitching that I see is part of the band construction itself, not where it is sewn to the hat, correct?
")
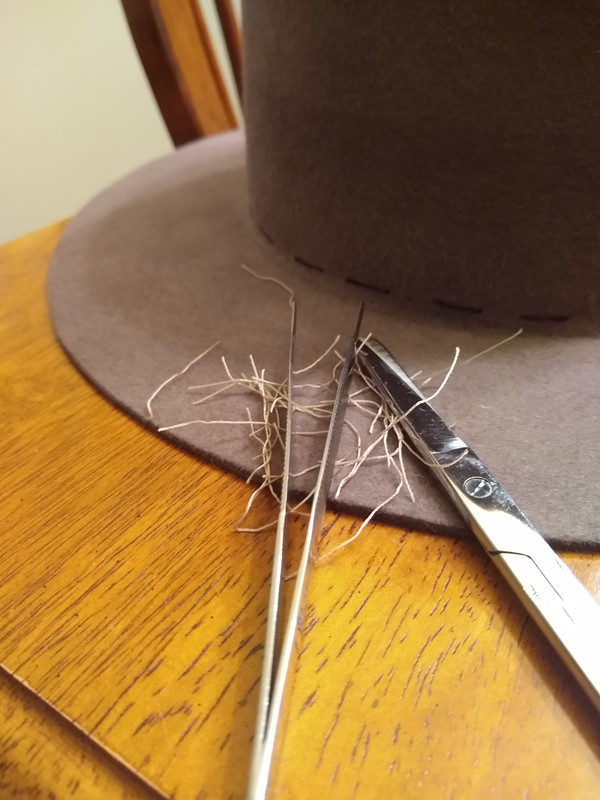
Yes, this is exactly what I do for my baste stitching. Except I use pink thread so I don't leave any still in the hat It still takes me about 20-25 minutes including set up for the baste.If you're hand sewing your sweats:
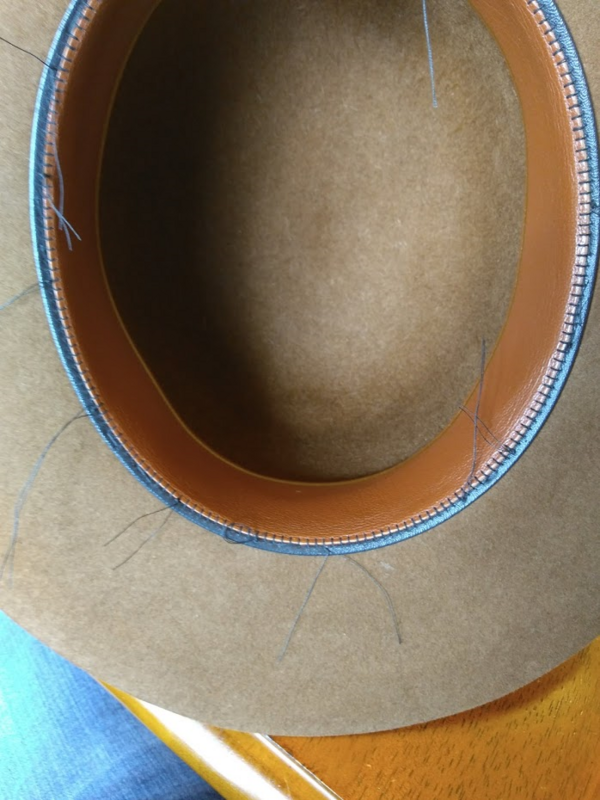
This is what I call, continuous baste stitching. It's just one piece of thread going all around the reed. It took me about five minutes to baste this sweat into the Melton I'm reworking. I found that this continuous basting works much better for me at keeping my sweat reed flush against the brim at the opening when I go to sew in my permanent stitches. Another little hint, use a different colored thread for your basting stitches since they'll be removed after the permanent stitches are sewn in...
Keep your basting stitches low, (as well as your permanent stitches too, only just a tad higher up on the crown than your basting stitches).
This is tack stitching for basting temporary stitches. I use to use this method thinking it was saving me some time but I found that continuous basting was much better at keeping my sweat reed flush against the brim at the opening...
Thanks, the client is a 60cm and a big tall guy. I went 6" crown 2 7/8" on the brim.Good call. I’m not a “screen accurate” kind of guy, but on its own merits Indy’s hat is a nice style. I haven’t done the math, but I think I’d need a 6” crown and 3+” brim.
Your first attempt looks very nice to me.