Want to buy or sell something? Check the classifieds
  • The Fedora Lounge is supported in part by commission earning affiliate links sitewide. Please support us by using them. You may learn more here.

Do try this at home: leather jacket repair tips

Marc mndt

I'll Lock Up
Messages
7,337
I've washed the jacket, removed the shoulder pads, glued some topcoat nicks, hand sewed the busted seams, replaced the elastic bands holding the gussets in place and reconditioned the leather. Now waiting for the replacement buttons to be delivered.

IMG_3843.jpeg
IMG_3845.jpeg
IMG_3898.jpeg
B8308FC1-3256-4BBE-9A9A-CF9A72461663.jpeg


40A30351-5B44-4D76-80F2-D5350F044AF2.jpeg


7A259B76-C518-4B1F-93E5-B7F22A304398.jpeg


IMG_4117.jpeg
IMG_4144.jpeg
 

PeterRocco

Practically Family
Messages
522
Location
Staten Island New York

Daniel Veit

One of the Regulars
Messages
173

PeterRocco

Practically Family
Messages
522
Location
Staten Island New York
I've washed the jacket, removed the shoulder pads, glued some topcoat nicks, hand sewed the busted seams, replaced the elastic bands holding the gussets in place and reconditioned the leather. Now waiting for the replacement buttons to be delivered.

View attachment 580827 View attachment 580828 View attachment 580829 View attachment 580832


View attachment 580831


View attachment 580830

View attachment 580834 View attachment 580833
Hi
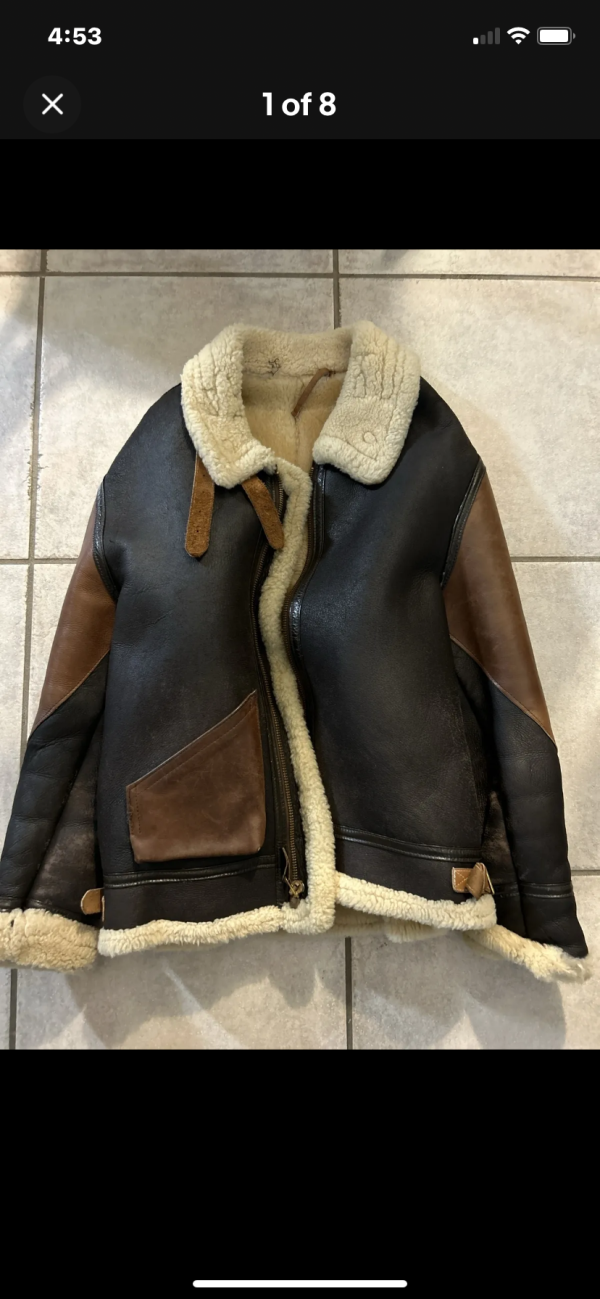
I’m still waiting for some member posting how they Reconditioned their Dried Sheepskin B-3 Flight Coat. I picked this 1990’s Willis & Geiger Flight Coat.
 

Attachments

  • IMG_6348.png
    IMG_6348.png
    1.8 MB · Views: 78

Yamahana

One Too Many
Messages
1,051
Location
Buckeye, Arizona
I've washed the jacket, removed the shoulder pads, glued some topcoat nicks, hand sewed the busted seams, replaced the elastic bands holding the gussets in place and reconditioned the leather. Now waiting for the replacement buttons to be delivered.

View attachment 580827 View attachment 580828 View attachment 580829 View attachment 580832


View attachment 580831


View attachment 580830

View attachment 580834 View attachment 580833
Good work there Slayer. I love this jacket, I’m quite partial to vintage button up for some reason. Are you going to tackle the liner yourself?
 

Marc mndt

I'll Lock Up
Messages
7,337
Hi
I’m still waiting for some member posting how they Reconditioned their Dried Sheepskin B-3 Flight Coat. I picked this 1990’s Willis & Geiger Flight Coat.
Nice jacket. It doesn't look like it needs to be reconditioned tbh.
 

Marc mndt

I'll Lock Up
Messages
7,337
Good work there Slayer. I love this jacket, I’m quite partial to vintage button up for some reason. Are you going to tackle the liner yourself?
Thanks. It's very time consuming but I quite enjoy it. Especially with an end result like this.

I've thought about it but I want it to be perfect so I think I'm going to send it over to Aero to have it re-lined. Black moleskin lining would be nice.
 

Nacho

Practically Family
Messages
598
I've washed the jacket, removed the shoulder pads, glued some topcoat nicks, hand sewed the busted seams, replaced the elastic bands holding the gussets in place and reconditioned the leather. Now waiting for the replacement buttons to be delivered.

View attachment 580827 View attachment 580828 View attachment 580829 View attachment 580832


View attachment 580831


View attachment 580830

View attachment 580834 View attachment 580833

Solid work, Marc. That saddle stitch is clean, brother! I can’t wait for the full review.
 
Last edited:

Marc mndt

I'll Lock Up
Messages
7,337
Trail and error, not all DIY jobs are a success.

Vintage jackets are great but those #5 cotton tape zippers suck, they will fail sooner or later.

I tried to save this one by gluing a piece of cotton zipper tape onto the failed part and then installing a replacement insertion pin.

DO NOT USE SUPERGLUE!

This is where it went wrong. When dry the superglue made the zipper tape hard and brittle, ultimately it crumpled apart. Also, the replacement insertion pin was of really low quality.

IMG_4576.jpeg
IMG_4577.jpeg
IMG_4633.jpeg
IMG_4631.jpeg
IMG_4636.jpeg
IMG_4637.jpeg


There was no way of saving this zipper, unfortunately. It now has a beefy #8 replacement repro zipper, installed by a professional. When the old one was removed part of the lining fell apart so a leather strip had to be installed on the inside hem.

CD9DDB7B-456C-401D-8F26-D59F0A0DBA92.jpeg


IMG_6246.jpeg
IMG_6247.jpeg
 

Marc mndt

I'll Lock Up
Messages
7,337
Last week when I dyed a NOS zipper the reinforcements at the base of the tape came loose so I glued them back into place using all purpose glue. To my surprise it worked perfectly (unlike the superglue I used on a previous attempt). It's still flexible when dry which is key.

IMG_5542.jpeg
IMG_5563.jpeg


So now I felt confident to do another zipper tape repair, this time using all purpose glue.

I used a NOS zipper as a donor for the reinforcement piece, it came loose after soaking it in hot water for an hour.

IMG_6234.jpeg
IMG_6235.jpeg
IMG_6236.jpeg


Before gluing the piece onto the zipper I cut away the old reinforcement as much as possible as you don't want the tape to become too thick (when too thick it won't slide into the zipper box anymore).

222A86BF-DD21-4E22-BC90-623633D3A9A1.jpeg


The end result, a reinforcement piece that's stiff without being hard or brittle.

IMG_6242.jpeg
 

Leather Walker

Practically Family
Messages
617
Location
Barcelona
Yes,
DO NOT USE SUPERGLUE!

This is where it went wrong. When dry the superglue made the zipper tape hard and brittle, ultimately it crumpled apart. Also, the replacement insertion pin was of really low quality.
It sucks:( Superglue crystallizes the fabric and turns it to a "fossil".

But fortunately you made an amazing work with the zipper! You are very skilled, Marc :)
 

Forum statistics

Threads
109,287
Messages
3,077,926
Members
54,238
Latest member
LeonardasDream
Top