So here's the story so far:
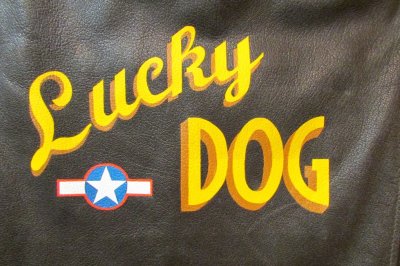
Now, once the job is done, it will of course look a bit bright and fresh to you – and you may wish to tone it down and “age” it - perhaps slightly, maybe more so. This is easily done in two ways: dark wash filters and/or dry brushing techniques.
Dry-brushing technique
Simply take some of your base colour that you are working with and, using water/Flow Improver as a medium, mix it with some Raw Umber (dark brown) and some Mars Black oil paint and, with a medium-sized brush, then rub the brush on your palette or a piece of paper, so that most of the paint is gone. With just a hint of it left, quickly and lightly rub it over your work and it will take the tone down a degree.
If you see an obvious brush stroke that you'd prefer didn't look like an obvious brush stroke, don't panic - rub it off and blend it out with a moistened Q-Tip, then add a bit more dry-brushing if you need to. Carefully does it at this stage. And remember that your work will age and fade with time too, so don’t over-do it.
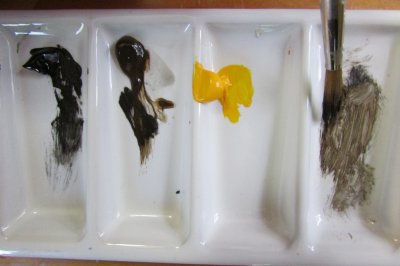
The paint prepared for dry-brushing.
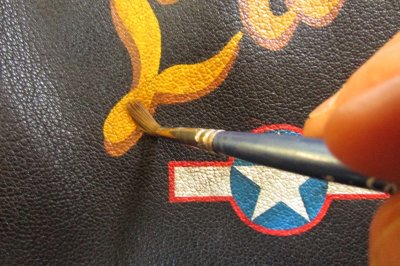
The paint being applied. Do this using quick, light and random strokes.
Dark wash technique
You could also make a wash of dark brown/black paint and water/Flow Improver – and with a paint brush, soak up the brush so it is wet and then randomly dab the design and let the wash flow on your design. You see immediately see how the dark wash collects and settles right into the crevices of the grains making a nice aging effect and the higher points will get a darker tone (but to a lesser degree of course). That will tone it down.
If you over-do it, don’t panic - just use a cloth or Q-Tip with clean water – moist, not wet again – and carefully remove what you’ve done.
Wait a couple of minutes and add more wash if you want to. You can add layers of dark washes until you get the effect/tone you want.
Then let it dry thoroughly.
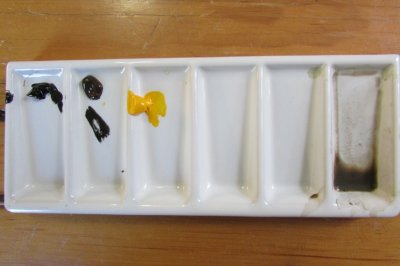
The paint wash is prepared. It looks like a dirty puddle and you may be hesistant to use it at first, but it is only a filter and its effect is subtle. Use more coats over the previous dried one to increase the effect.
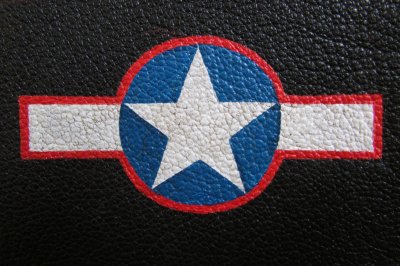
The first light wash applied. Note how the filter has settled more inbetween the grains of leather - a nice effect.
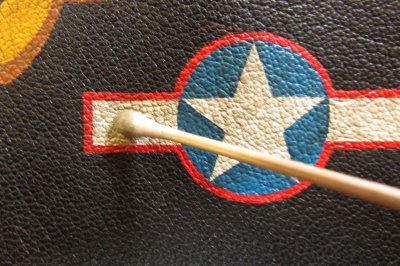
Use a moist Q-Tip to remove any unwanted strokes or paint. Then correct with more wash or dry-brushing if you wish to.
Once the job is completed, after a week's drying to reach a full cure, (the website for Liquitex says 48-72 hours. I say give it more. What's the harm?) you will want to put a single layer of acrylic varnish over your work to protect it. Just one coat is all you need – use more and it will look milky and you don't want that! So less is more in this instance.
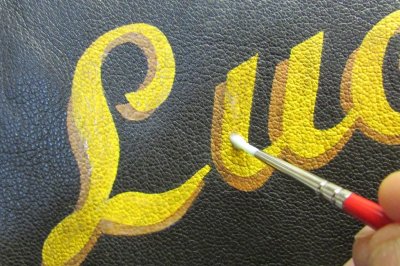
The matt varnish going on - shiny and milky. This is evident in the photo, but it will dry totally clear and matt, so there really wouldn't be anything to see with another photo of this stage.
Varnishes can be white – but don’t worry. They go on white but dry completely clear.
Varnishes come in matt, semi-gloss and gloss finishes - so you may need to mix a couple together to match the sheen of your jacket if you need to blend any correction you made in with the natural finish of the jacket and achieving this is just trial and error.
Don’t use the Tension Breaker/Flow Improver with your varnish. They're supposed to work fine by themselves but check with the website with whatever brand you've chosen to use.
And finally, I'd wait a week for the varnish to cure before I wore it outside ...
I gave Lucky Dog a nice dry-brushing and a good dark wash – and I considered it finished … and I announced it thusly in the teaser trailer thread.
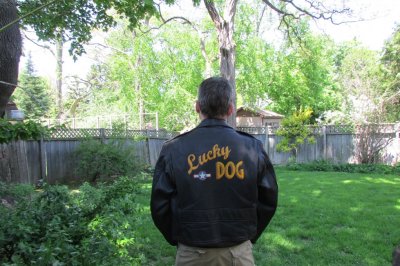
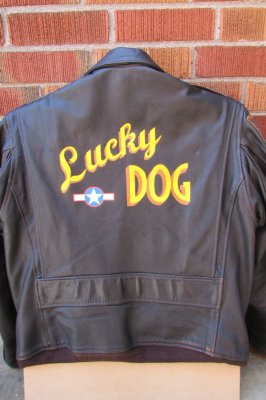
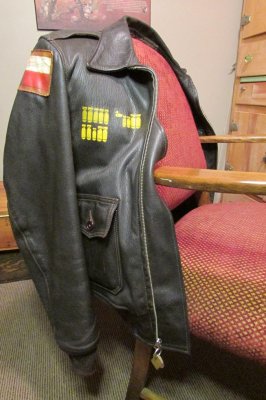
But still, the art rested on its easel and looked at me here at work for a few weeks ... and no matter how much I had thought it was finished, at the back of my mind, I still felt that it looked too bright to me.

Lucky Dog - before any "aging and weathering".
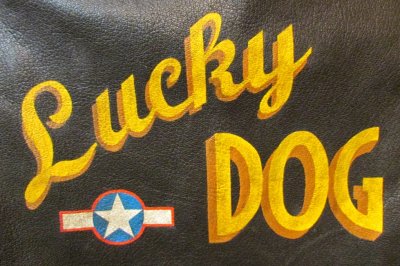
Lucky Dog - after "aging and weathering"
So then I decided to age it much further – and I gave it two more dark washes.
Then, by chance, I took a course on using Annie Sloan chalk paints and I decided to use some of her finishing waxes on it to really darken it even more by using it both as a stain and protective layer (taking the jacket to how it looks today) … and that will be covered in the next instalment.
End of Part 8.

Now, once the job is done, it will of course look a bit bright and fresh to you – and you may wish to tone it down and “age” it - perhaps slightly, maybe more so. This is easily done in two ways: dark wash filters and/or dry brushing techniques.
Dry-brushing technique
Simply take some of your base colour that you are working with and, using water/Flow Improver as a medium, mix it with some Raw Umber (dark brown) and some Mars Black oil paint and, with a medium-sized brush, then rub the brush on your palette or a piece of paper, so that most of the paint is gone. With just a hint of it left, quickly and lightly rub it over your work and it will take the tone down a degree.
If you see an obvious brush stroke that you'd prefer didn't look like an obvious brush stroke, don't panic - rub it off and blend it out with a moistened Q-Tip, then add a bit more dry-brushing if you need to. Carefully does it at this stage. And remember that your work will age and fade with time too, so don’t over-do it.

The paint prepared for dry-brushing.

The paint being applied. Do this using quick, light and random strokes.
Dark wash technique
You could also make a wash of dark brown/black paint and water/Flow Improver – and with a paint brush, soak up the brush so it is wet and then randomly dab the design and let the wash flow on your design. You see immediately see how the dark wash collects and settles right into the crevices of the grains making a nice aging effect and the higher points will get a darker tone (but to a lesser degree of course). That will tone it down.
If you over-do it, don’t panic - just use a cloth or Q-Tip with clean water – moist, not wet again – and carefully remove what you’ve done.
Wait a couple of minutes and add more wash if you want to. You can add layers of dark washes until you get the effect/tone you want.
Then let it dry thoroughly.

The paint wash is prepared. It looks like a dirty puddle and you may be hesistant to use it at first, but it is only a filter and its effect is subtle. Use more coats over the previous dried one to increase the effect.

The first light wash applied. Note how the filter has settled more inbetween the grains of leather - a nice effect.

Use a moist Q-Tip to remove any unwanted strokes or paint. Then correct with more wash or dry-brushing if you wish to.
Once the job is completed, after a week's drying to reach a full cure, (the website for Liquitex says 48-72 hours. I say give it more. What's the harm?) you will want to put a single layer of acrylic varnish over your work to protect it. Just one coat is all you need – use more and it will look milky and you don't want that! So less is more in this instance.

The matt varnish going on - shiny and milky. This is evident in the photo, but it will dry totally clear and matt, so there really wouldn't be anything to see with another photo of this stage.
Varnishes can be white – but don’t worry. They go on white but dry completely clear.
Varnishes come in matt, semi-gloss and gloss finishes - so you may need to mix a couple together to match the sheen of your jacket if you need to blend any correction you made in with the natural finish of the jacket and achieving this is just trial and error.
Don’t use the Tension Breaker/Flow Improver with your varnish. They're supposed to work fine by themselves but check with the website with whatever brand you've chosen to use.
And finally, I'd wait a week for the varnish to cure before I wore it outside ...
I gave Lucky Dog a nice dry-brushing and a good dark wash – and I considered it finished … and I announced it thusly in the teaser trailer thread.


But still, the art rested on its easel and looked at me here at work for a few weeks ... and no matter how much I had thought it was finished, at the back of my mind, I still felt that it looked too bright to me.

Lucky Dog - before any "aging and weathering".

Lucky Dog - after "aging and weathering"
So then I decided to age it much further – and I gave it two more dark washes.
Then, by chance, I took a course on using Annie Sloan chalk paints and I decided to use some of her finishing waxes on it to really darken it even more by using it both as a stain and protective layer (taking the jacket to how it looks today) … and that will be covered in the next instalment.
End of Part 8.
Last edited:
